
Welcome back to A Wilder Finish!!
I'm excited to share this project with you. My parents are close to retirement - well, my Dad is already of retirement age but continues to work - and they have a home north of San Diego that they plan to move into in a couple of years. In the interim, my mother purchased a town home and some inexpensive furniture from CL. As you can see in the picture below, some of the pieces are not too appealing. But in her mind, this furniture means nothing to her so she isn't concerned with its look - their pieces are all in California.
Yay DIY furniture refinishing!
My son and I traveled to Houston for a visit over Valentine's Day weekend - it was just a mommy and son trip, where daddy stayed home. "Mom", I said, "let's take this old and tired TV console to the furniture spa!" It was my Valentine's Day present to my parents. They were pretty excited about it, so I guess they do care.

Here's the Project from Start to Finish!

Step 1: Supplies and Prep Work. Since I was not at home where I have all of my supplies, the first thing I needed to do was to buy supplies. One of the more prohibitive aspects of furniture refinishing is the amount of capital (supplies) required to get started. At Home Depot, I purchased the absolute bare minimum (which of course included the 1 in 14 painters tool shown in the pic below) that totaled $92. Once purchased many of these supplies can be used again, but it does reiterate the fixed (and marginal) cost of refinishing, not to mention the implicit costs via time and effort.
I sanded the TV console by hand since I didn't want to purchase an electric sander and primed the surface. As you can see, there was a very shiny finish to the piece, so I needed a good surface for the paint.
I tinted the primer with a little bit of the gray latex paint - I chose the color Behr Sparrow. My mom wanted gray, so I decided to try out one of these color codes for the latex paint substitutes to the famous Annie Sloan chalk paint colors. Behr Sparrow is all right, but I like Benjamin Moore Coventry Gray in satin finish better. Problem is, that the Benjamin Moore brand is $26 per quart!

Step 2: Paint. One long day later (sanding and priming did take a while), I was ready to paint. I always put on two coats of paint. However, I've noticed that some do only one. In my view with just one coat, the paint looks much thinner (obviously). However, this can alone make the piece look aged if you don't prime since the thin paint allows the wood to peek through in some areas. I prefer two coats of paint and primer. That's just me, I guess. I suspect that the durability of the job is better - what do you all think?
I decided to paint the drawers, inside of the front doors, and back of the console black. This added a bit of flare to the piece!

Yes, I had my helper. I painted a black face on this pumpkin. Why my parents have a pumpkin in their courtyard is anybody's guess.

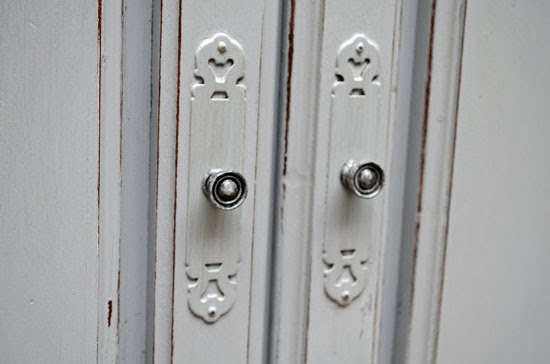
Step 3: Distress!! Since this was for my parents, I asked them what degree of destressing they would prefer. On a 10-scale my mother wanted a 4. That was doable. However, I wasn't able to practice beating the piece up. I want to do that - you know, hit it with a wrench or chain links to really give it a good beating before glazing it. Ah well, next time.
I did a very standard distressing here and didn't age it with glaze or stain. I probably should have but I didn't buy those supplies. Besides, I really like the color of the wood peeking through so I was totally okay with it. What do you think?


Bex Wilder
No comments:
Post a Comment